Integrating fastlane with CircleCI to deploy with Crashlytics (Fabric)
Why fastlane? (Or better - why would you not use fastlane?!)
Since the creation of CocoaPods, the best thing to happen to the iOS community, by the iOS community, is fastlane. Initially developed by Felix Krause, with the contribution of tens of people, it allows developers to automate a bunch of tasks that are done manually, repeatedly, each and every time we wanted to release an update for our apps. If you aren’t familiar with fastlane, I suggest you to watch this presentation by the author.
But better than running a lane in the command line in your local computer, is setting up a Continuous Integration to do it for you. For example, every time you merge your code to the master branch, submit to the AppStore; every time you merge your code to the develop branch, upload a new beta to Crashlytics. This can be done with services like Jenkins (if you have a dedicated machine to do so), Travis CI, or CircleCI. Because CircleCI has an affordable pricing, I wanted to use it to set up the deployment cycle for my current indie project. And as I encountered a few hurdles on the way, and had a lot of failing builds until it succeeded, I learned a lot and wanted to share in this post (Ah, don’t miss the bonus in the end!)
The Fastfile
When fastlane runs, it will look for a few files inside the fastlane folder. This folder is created when you run fastlane init in the command line and configure the project. The most important is called Fastfile, where you configure different lanes you want, each one with different series of actions. For example, the lane can run tests, submit the app to TestFlight, submit to the App Store, and so on. The documentation for the Fastfile can be found here.
To start, let’s tell fastlane which platform we are talking about, what is the minimum version of fastlane required for this one, and what are the initial environment variables that will be used in the lanes. Everything inside before_all will run before any lane is started.
Now, let’s define the Fabric lane. Basically, every time fastlane runs it, the following steps will happen:
☑️ Run pod install via fastlane action cocoapods;
☑️ Run our own method import_certificates, that will add the certificate and the key related to the provisioning profile used to distribute the app;
☑️ Run sigh (another part of the fastlane tools), that will create and/or download the necessary AdHoc provisioning profile;
☑️ Set the environment variable PROFILE_UDID, that fastlane uses to associate the build with the correct provisioning profile;
☑️ Run gym, that will build the app (with my specific parameters; in my case, the AdHoc version should to be built, so I use the correct scheme for it);
☑️ Upload to Crashlytics (in my case, I didn’t want notifications, so I turned them off by passing the notifications: false parameter.
Oh, Certificates and Provisioning Profiles…
Now, the tricky part: as CircleCI creates a new instance, temporary, for every build, it needs to be able to access the certificate and add it to the keychain of the CircleCI instance - we don’t want to create a new certificate for every build! Taking this into account, create a new folder called certificates inside your fastlane directory; find the certificate you are using (or the one associated to the provisioning profile) and add it there. The other file you will need, is the .p12 key. To get it, open the Keychain Access app in your Mac, find the certificate, find the key, and select Export as shown in this image. Save as a .p12 file.
Don’t forget that the password you use to export the key, needs to be defined as an environment variable - I’ll explain later how to do it.
This is how your certificates folder should look like:
We are almost done with the Fastfile. Finally, add the import_certificates method. It will create the keychain in the temporary CircleCI instance, and import to it the files we just put in the folder. Don’t forget that we are using environment variables here like KEYCHAIN_NAME and KEYCHAIN_PASSWORD that must be setup in the before_all method - again, I’ll explain below how to do it.
The full gist for this Fastfile can be found here. I also added a beta lane for sending to TestFlight (in my case, I wanted it not to submit the app to review, so I set pilot(skip_submission: true), and an appstore lane.
Configuring the circle.yml file
Now, the easy part. We just need to tell CircleCI which lanes we want it to run in which conditions.
(If you are using a tool like mogenerator and your build process depends on it, you must add the lines 5-7. Otherwise, ignore it.) In the deployment part, we defined 3 different commands:
⚪️ Staging: whenever there is new code in the develop branch, it should run the lane fabric_silent
⚪️ Beta: whenever there is a new tag in my repository like beta-v0.7.3 or beta-v0.8, run the beta lane and send to TestFlight
⚪️ Release: whenever there is a new tag in my repository like release-v1.0 or release-v1.1, run the App Store lane to submit it.
Important note: In order to make fastlane available, you need to add a Gemfile to your project root:
Configuring the Environment Variables
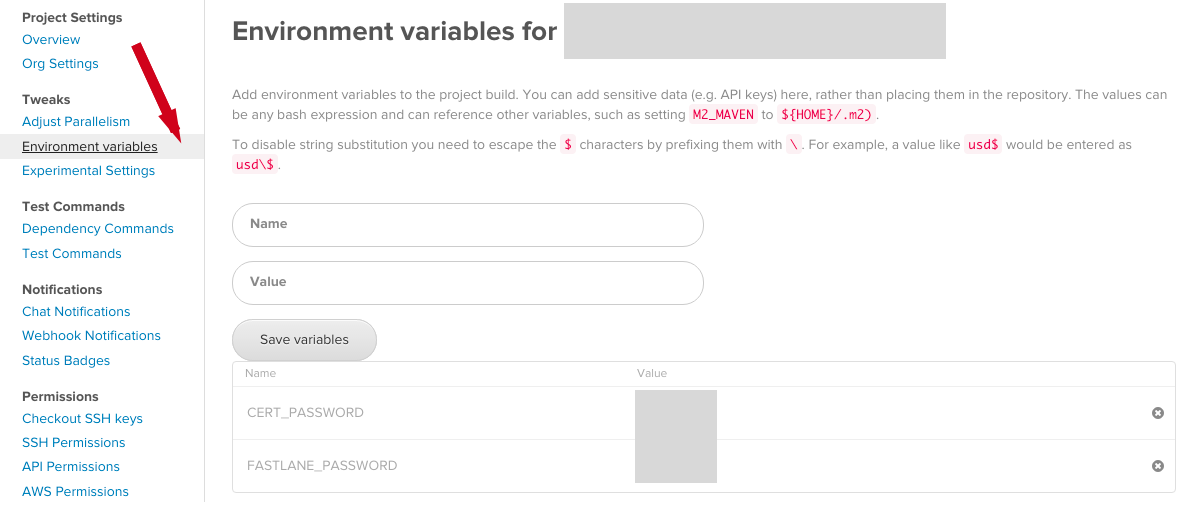
As we don’t want to store the certificate as plain text in the Fastfile, we will use the CircleCI environment variables, that are stored correctly. Add the CERT_PASSWORD name and value (your .p12 certificate password). Also, if you are using sigh as we mentioned above, also setup FASTLANE_PASSWORD as your Apple ID login password, to download the provisioning profiles. You should also set here the KEYCHAIN_PASSWORD to create and unlock the keychain for storing the certificate.
In case you want to run fastlane locally (and not in CircleCI) , you can store these variables in the ~/.bashrc file. To do it, you should do the following:
☑️ Open the ~./bashrc file with your preferred text editor (I like using Atom, so in Terminal, do the following): atom ~./bashrc;
☑️ Add the environment variables this way:
export CERT_PASSWORD=your_p12_password
export KEYCHAIN_PASSWORD=temp_keychain_password
export FASTLANE_PASSWORD=your_apple_id_password
☑️ Save the ~./bashrc file;
☑️ Enter source ~/.bashrc in Terminal to reload it without the need to restart it.
(You can also check this guide on GitHub for more options on how to set the environment variables)
Now you should have your most recent app waiting for you in the Crashlytics Beta app! Hooray! You can ping me @natanrolnik if you find any problems and I’ll try to help.
Bonus - push notifications!
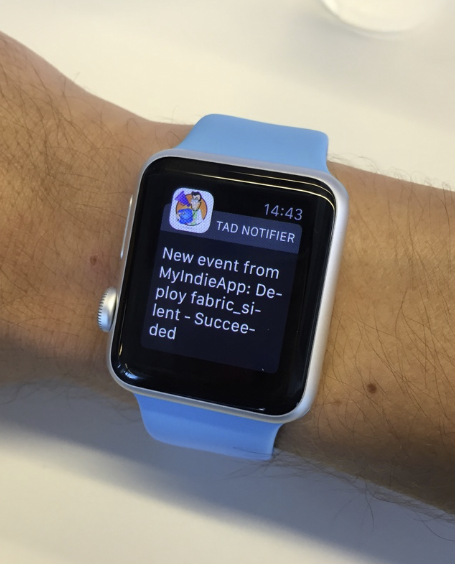
Wouldn’t it be cool if I could be notified every time a build finishes or fails? I created a small Parse app (with custom Cloud Code after save triggers) to send push notifications to my phone. You will need to setup Cloud Code and create an iOS app (to install on your phone) that will receive the notification.
Whenever a lane succeeds, the after_all method is called, and whenever a lane fails, the error method is called:
And using the Parse Rest API, I defined my own push_notify method that adds the LaneResult object to Parse. (Don’t forget to add your parse keys at lines 9 and 10 - in this case, you can also set them as environment variables to keep it more secure, but I don’t think it’s needed here, as these are the keys of my own notifier app):
This is how the after save method looks like in the main.js file of the Parse app Cloud Code:
(You can also use fast lane’s action slack to post the result to your Slack channel or group. Check out here how to do it)
The result?


